Posts Tagged ‘curing time’
Concrete Patio Installation Process Site Preparation, Curing Time
Installing a concrete patio requires thorough site assessment, proper drainage evaluation, and soil testing for load capacity. The process involves excavating 4-6 inches deep, installing a 4-inch compacted gravel base, and building sturdy forms with correct slope for drainage. Once concrete is poured and finished, the critical curing period spans 7-14 days with temperatures above 50°F, followed by sealer application at 28 days. Understanding each step's technical requirements guarantees ideal results and long-term durability.
Expert Highlights
- Excavate 8-10 inches total depth, removing organic material and installing 4 inches of compacted gravel base for proper drainage.
- Compact soil to 95% density using mechanical plate compactors, working in 2-inch layers for optimal stability.
- Install proper forms using 2×4 or 2×6 lumber, securing with stakes and ensuring correct slope for drainage.
- Pour concrete mixture with 0.45-0.50 water-cement ratio, working systematically from uphill to downhill to prevent cold joints.
- Allow concrete to cure for 7-14 days while maintaining moisture and temperature above 50°F, followed by 28 days before sealing.
Site Assessment and Planning
Before any concrete patio installation can begin, a thorough site assessment and detailed planning phase must be completed to guarantee project success. Property owners should evaluate drainage patterns, soil conditions, and existing structures that could impact the project, while considering local building codes and permit requirements.
The assessment phase requires accurate measurements of the proposed patio area, including length, width, and desired thickness of the concrete slab. Professionals typically conduct soil testing to determine load-bearing capacity and identify potential issues like expansive clay or unstable fill material that could compromise the foundation.
During planning, homeowners must decide on design elements such as finish texture, color options, and whether to incorporate features like built-in drainage systems or decorative borders. They should also calculate precise material quantities needed for the project's scope. Working with certified concrete experts ensures proper placement of control joints and optimal concrete mix selection for your specific project needs.
Ground Preparation and Excavation
The excavation phase of concrete patio installation requires careful attention to proper depth requirements, which typically range from 4 to 6 inches for the concrete slab plus an additional 4 inches for the gravel base.
Following excavation, the exposed soil must be thoroughly compacted using mechanical plate compactors or vibratory rollers to achieve a density of at least 95% of the soil's maximum dry density.
The compaction process should be performed in multiple passes across the entire area, with particular focus on the perimeter and any areas that will bear significant weight, ensuring a stable foundation that prevents future settling or cracking of the concrete surface.
With proper maintenance, a well-installed concrete patio can provide up to 30 years of lasting durability and beauty.
Proper Depth Requirements
Proper excavation depth represents a critical foundation for any concrete patio installation, requiring careful consideration of multiple factors to guarantee long-term structural stability.
The standard depth for residential concrete patios typically ranges from 4 to 6 inches, depending on local building codes and intended use.
For areas with freeze-thaw cycles, contractors must excavate below the frost line, which varies by region but generally extends 12 to 48 inches deep.
The base layer, consisting of compacted gravel or crushed stone, should measure 4 to 6 inches thick to assure adequate drainage and support.
When factoring in slope requirements for water runoff, installers should incorporate a minimum grade of 1/8 inch per linear foot, sloping away from any adjacent structures to prevent water accumulation and potential foundation damage.
Soil Compaction Methods
Following accurate depth measurements and excavation, successful soil compaction serves as the cornerstone of durable concrete patio construction, requiring methodical ground preparation through multiple compaction phases.
Professional contractors employ mechanical plate compactors and vibratory rollers to achieve ideal soil density, typically compacting in 2-inch layers until reaching 95% maximum density.
- Inadequate soil compaction can lead to devastating settling issues and cracking
- Proper compaction prevents costly repairs and extends patio longevity
- Quality compaction protects property value and aesthetic appeal
- Well-compacted soil guarantees structural integrity for generations
The compaction process begins with removing organic material and loose soil, followed by adding clean fill material where necessary.
Contractors then use water to achieve ideal moisture content, which aids in reaching maximum soil density through systematic mechanical compression of each layer.
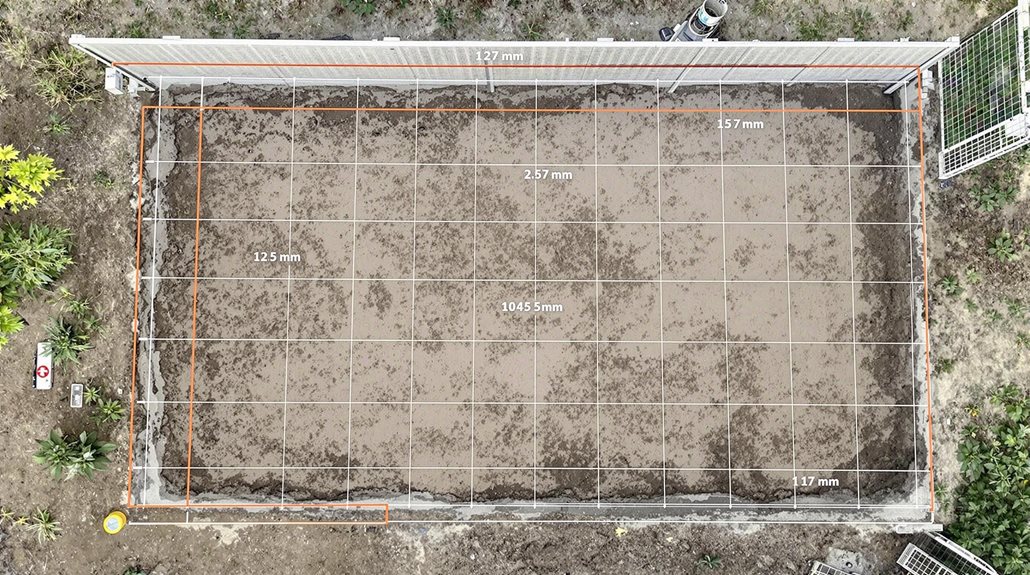
Building Forms and Setting Grades
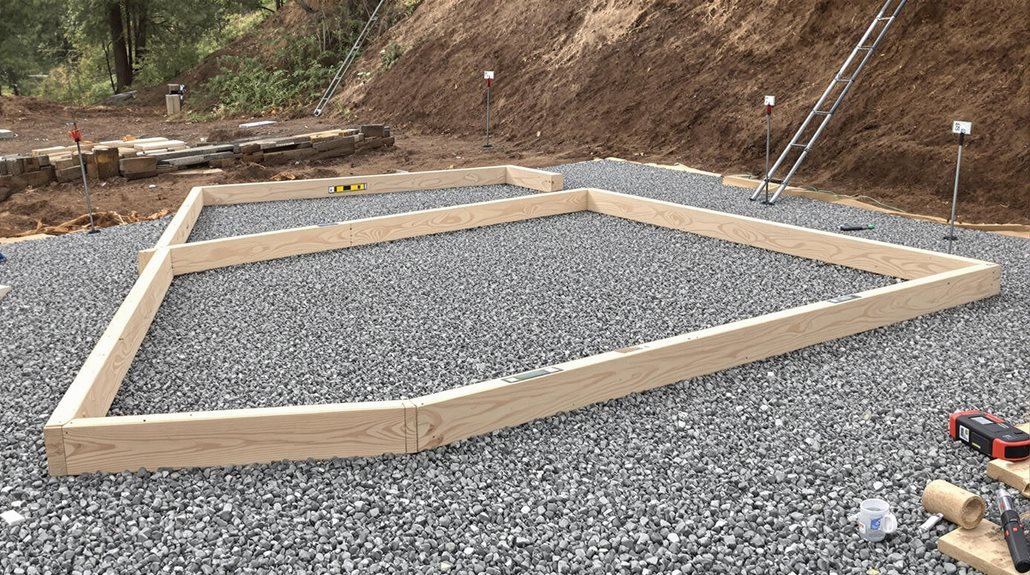
Setting up precise forms and establishing correct grades represent critical first steps in creating a lasting concrete patio installation. Professional contractors utilize sturdy lumber, typically 2x4s or 2x6s, secured with stakes driven at 4-foot intervals to create rigid boundaries for the concrete pour.
The forms must be level across their length while maintaining a slight slope, typically 1/8 inch per foot, away from the house foundation to guarantee proper drainage. Contractors verify grades using laser levels or transit equipment, checking measurements at multiple points to confirm uniform thickness.
Metal form pins, wooden stakes, and structural support braces work together to prevent form movement during the concrete pour.
The top edges of forms serve as screeding guides, making their precise positioning essential for achieving the desired finished elevation and surface uniformity.
With proper maintenance, a well-installed concrete patio can last up to 30 years while requiring minimal upkeep compared to other materials.
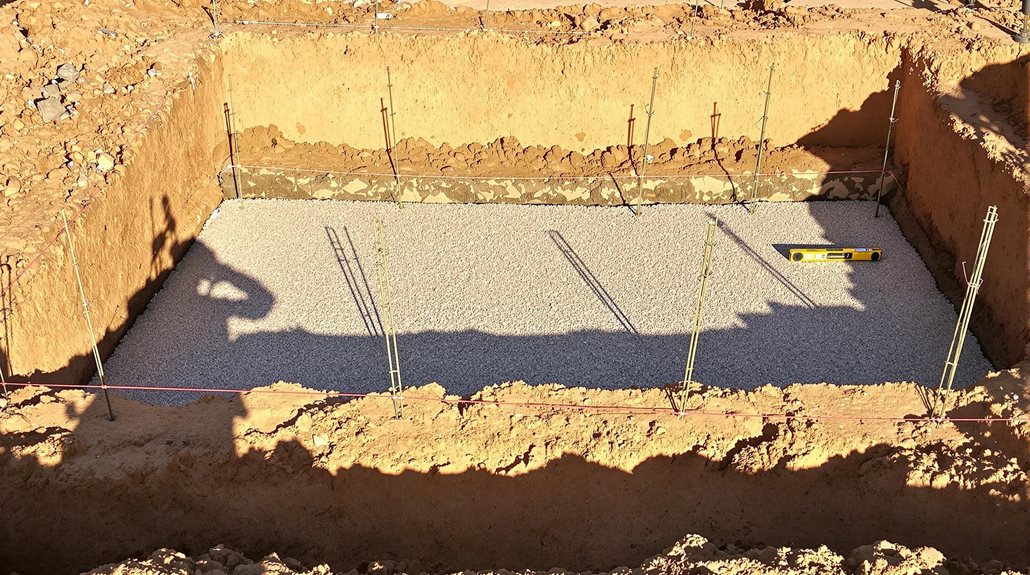
Installing Base Materials and Reinforcement
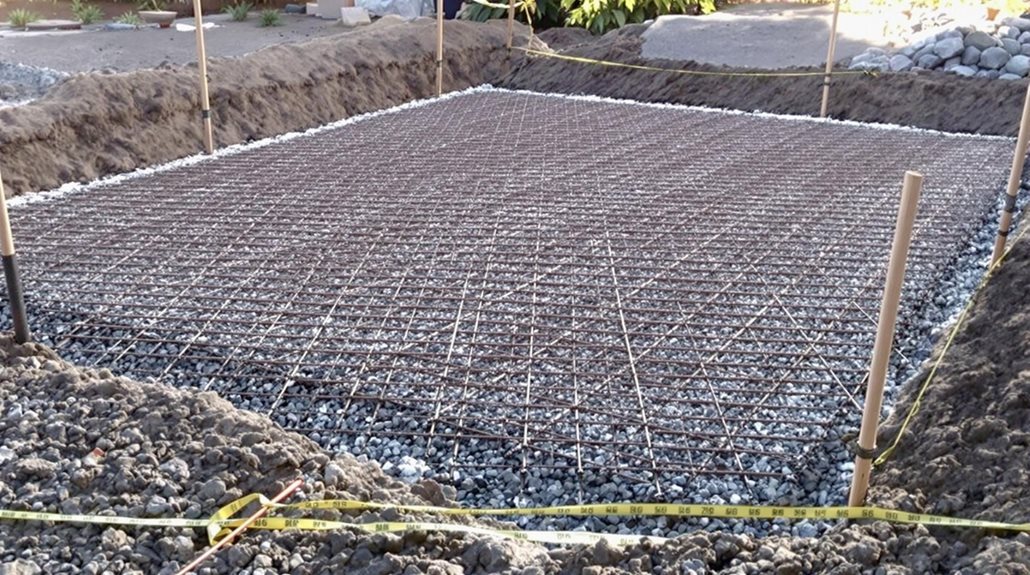
Before contractors pour any concrete, a properly compacted base of crushed stone or gravel must be installed to provide essential structural support and drainage capabilities.
Most construction professionals recommend a 4-inch minimum depth of aggregate, mechanically compacted to achieve 95% density.
As a Twin Cities contractor with over 10 years of experience, Legacy General Services ensures proper base preparation for every patio project.
With the base prepared, contractors install reinforcement materials to prevent cracking and guarantee structural integrity.
Common reinforcement options include:
- Steel rebar grids, precisely tied and elevated on chairs for ideal positioning
- Welded wire mesh, offering uniform strength distribution across the entire surface
- Fiber reinforcement additives, enhancing concrete's tensile strength
- Steel edge bars, providing additional support along the patio perimeter
The reinforcement materials must maintain proper coverage within the concrete, typically positioned in the middle third of the slab thickness for maximum effectiveness.
Mixing and Pouring Concrete
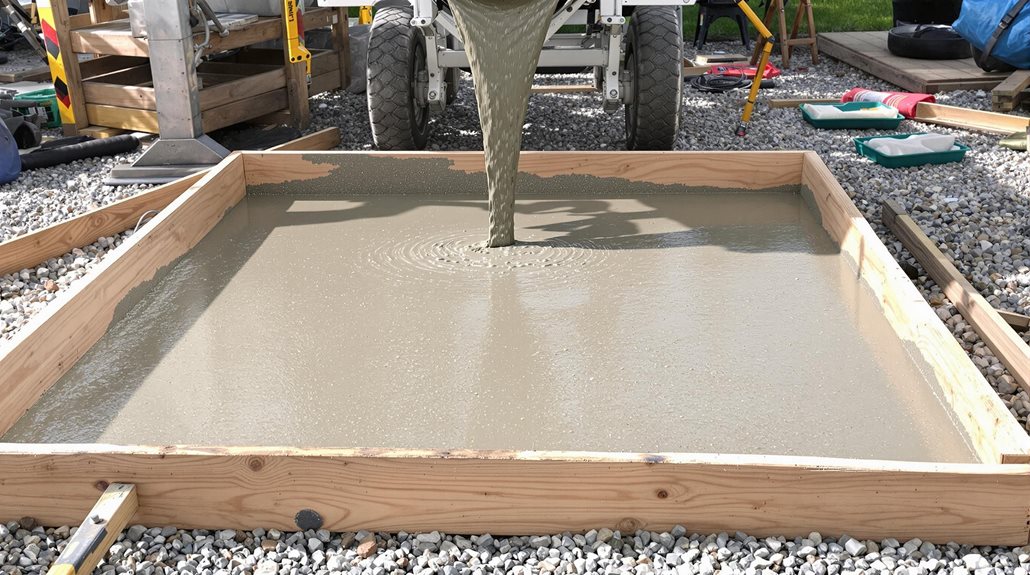
The mixing phase requires careful attention to achieve the ideal concrete consistency, which typically involves combining Portland cement, aggregates, and water in a 1:2:3 ratio while monitoring slump levels between 2-4 inches.
Workers must blend these materials thoroughly in a mechanical mixer, ensuring uniform distribution and proper hydration of all components without over-mixing, which can weaken the final product.
Once mixed, the concrete should be poured in a controlled, continuous manner, starting from the farthest point and working backward, while maintaining consistent thickness and preventing segregation of aggregates.
For stamped concrete projects, certified team members carefully monitor the mix to ensure optimal workability for creating detailed pattern impressions.
Proper Mix Ratio Steps
Proper concrete mix ratios represent the cornerstone of a successful patio installation, requiring careful attention to proportions and timing throughout the mixing process.
Professional contractors follow established guidelines for combining portland cement, aggregates, and water in precise measurements to achieve ideal strength and workability.
The standard mix ratio for residential patios typically follows these essential steps:
- Begin with clean, measured materials to guarantee consistent batch quality
- Add 1 part portland cement to 2 parts sand and 3 parts gravel
- Incorporate water gradually until reaching a 0.45 to 0.50 water-to-cement ratio
- Mix thoroughly for 5-7 minutes to achieve proper consistency
Once combined, contractors must maintain uniform mixing procedures across multiple batches, testing slump values between 3-5 inches to verify proper workability before placement begins.
Pour With Controlled Flow
Pouring concrete demands precise control over flow rates and placement techniques to achieve ideal coverage and consolidation during the installation process. Contractors must maintain a steady, methodical approach while directing concrete flow from mixer trucks or wheelbarrows to guarantee uniform distribution across the prepared surface area.
| Flow Control Factor | Impact | Best Practice |
|---|---|---|
| Pour Rate | Affects workability | 2-3 ft/minute steady pace |
| Pour Pattern | Distribution uniformity | Serpentine or parallel strips |
| Flow Direction | Material consistency | Pour uphill to downhill |
The installation team should work systematically from one end of the form to another, using hand tools to guide the concrete while maintaining a consistent thickness throughout the pour. This methodical approach helps prevent cold joints, guarantees proper consolidation, and creates ideal conditions for finishing operations.
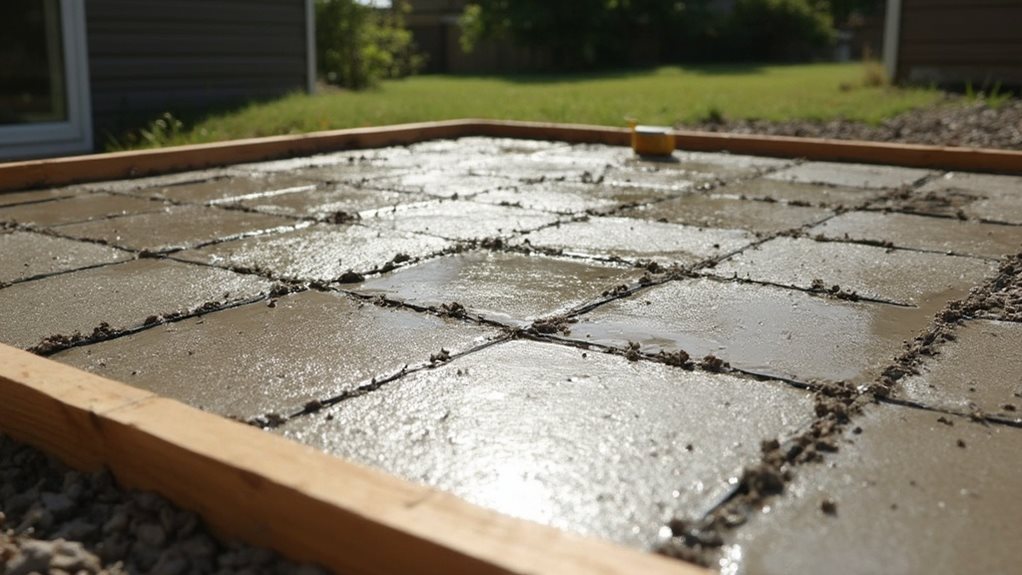
Finishing Techniques and Surface Textures
Creating beautiful surface textures begins after the concrete has been poured and screeded but before it starts to harden. This critical timing allows contractors to apply various finishing techniques that dramatically impact the patio's final appearance.
The art of concrete finishing demands precise timing – too early or too late, and the perfect surface texture becomes impossible to achieve.
Professional finishers must carefully monitor the concrete's setting process to determine the best moment for texturing.
Common surface finishing options include:
- Smooth trowel finish, providing a classic, refined appearance ideal for outdoor furniture
- Broom finish, creating subtle linear patterns that enhance slip resistance
- Exposed aggregate finish, revealing decorative stones within the concrete mix
- Stamped patterns, replicating natural materials like brick, stone, or slate
The selected texture not only influences aesthetics but also affects maintenance requirements and safety considerations.
This makes proper technique application essential for long-term satisfaction with the finished patio surface.
Expert craftsmanship from skilled professionals ensures each finishing technique is executed with precision and durability.
Proper Curing Methods and Timeline
Once the concrete surface finishing is complete, the critical curing phase must begin immediately to guarantee ideal strength development and prevent premature cracking. The concrete must maintain adequate moisture content for proper hydration, which requires consistent water application or moisture-retaining measures for 7-14 days.
Professional contractors typically employ one of three primary curing methods: water curing through regular spraying, covering with moisture-retaining materials like wet burlap, or applying chemical curing compounds. The temperature should remain above 50°F (10°C) throughout the entire curing period.
During the first 24-48 hours, the concrete requires the most intensive monitoring and moisture maintenance.
After seven days, the concrete will have achieved approximately 70% of its intended strength, though complete curing continues for 28 days to reach maximum structural integrity.
Sealing and Long-Term Maintenance
To maximize the longevity and appearance of a newly installed concrete patio, proper sealing should be performed approximately 28 days after the initial pour, once complete curing has occurred.
Professional-grade penetrating sealers provide superior protection against moisture intrusion, staining, and freeze-thaw damage, while maintaining the concrete's natural appearance.
Regular maintenance guarantees ideal performance and extends the patio's lifespan. Homeowners should implement these essential practices:
- Sweep debris weekly to prevent surface abrasion and maintain aesthetic appeal
- Clean spills immediately using pH-neutral cleaners to avoid staining and deterioration
- Reapply sealer every 2-3 years, depending on weather exposure and wear patterns
- Inspect annually for cracks or damage, addressing repairs promptly to prevent escalation
For extensive cleaning, a pressure washer set at 2,500-3,000 PSI effectively removes accumulated grime without damaging the concrete surface.
Frequently Asked Questions
Can I Install a Concrete Patio During Winter Months?
Installing concrete patios during winter requires extra precautions. Cold temperatures slow curing and can cause damage. Professional contractors use specialized techniques and additives to guarantee proper installation in cold weather.
How Much Will My Utilities Increase With a Heated Concrete Patio?
Operating costs for heated concrete patios typically increase monthly utility bills by $100-300 during winter months, depending on size, local energy rates, and temperature settings.
Will Tree Roots Eventually Damage My Concrete Patio?
Tree roots can indeed damage concrete patios over time, causing cracks and uneven surfaces. Installing root barriers and maintaining proper distance from large trees helps prevent this common problem.
Can I Match My Existing Concrete Patio Color With a New Addition?
Matching existing concrete color is possible through color hardeners, stains, or integral pigments. Professional concrete contractors can analyze the old surface and recommend suitable color-matching solutions.
Does a Concrete Patio Affect My Home's Resale Value?
A well-designed concrete patio typically increases home resale value by enhancing outdoor living space. Most homeowners recover 50-80% of installation costs through improved property value and curb appeal.
Expert Final Thougts
A properly installed concrete patio requires careful attention to each phase, from initial site preparation through final curing and sealing. Following industry best practices for ground preparation, reinforcement, concrete mixing, and finishing techniques guarantees peak strength and longevity. With proper maintenance including periodic cleaning and resealing, a well-constructed concrete patio can provide decades of durable, functional outdoor living space while maintaining its aesthetic appeal and structural integrity.