Concrete
3 Tips for Choosing the Right Concrete Contractor
Choosing the right concrete contractor involves evaluating their experience and reputation, reviewing detailed quotes and warranties, and verifying licenses and insurance. Contractors with extensive industry longevity and a strong portfolio offer stability, while client references and online reviews provide insights into work quality. Verifying professional credentials such as licenses and liability insurance is essential. For further insights, exploring specific warranty terms and material quality can help guarantee a successful project.
Expert Highlights
- Ensure the contractor is licensed and insured.
- Evaluate client references and online reviews.
- Assess longevity and industry certifications.
- Compare detailed quotes with material breakdowns.
- Verify warranty terms and post-project support.
Assessing Experience and Reputation
When evaluating potential concrete contractors, gauging their experience and reputation is essential for ensuring the success of a construction project.
A contractor's longevity in the industry, typically five years or more, indicates their ability to handle challenges and maintain client relationships effectively.
Requesting a thorough portfolio of past projects and client references allows for an assessment of work quality and reputation.
Online reviews from platforms like Google and Yelp also provide valuable insights into customer satisfaction and overall reputation.
This evaluation helps identify contractors who consistently deliver high-quality results.
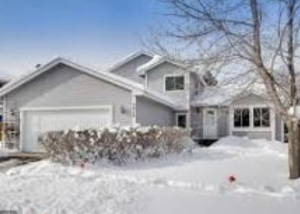
Companies like Twin Cities contractors demonstrate industry expertise through their decade-plus experience serving both residential and commercial properties.
Evaluating Quotes and Warranties

Evaluating quotes from concrete contractors involves a meticulous examination of several key components.
The comparison should include detailed breakdowns of costs, materials, and labor.
- Cost Breakdown: Ascertain quotes specify costs for materials, labor, and other expenses.
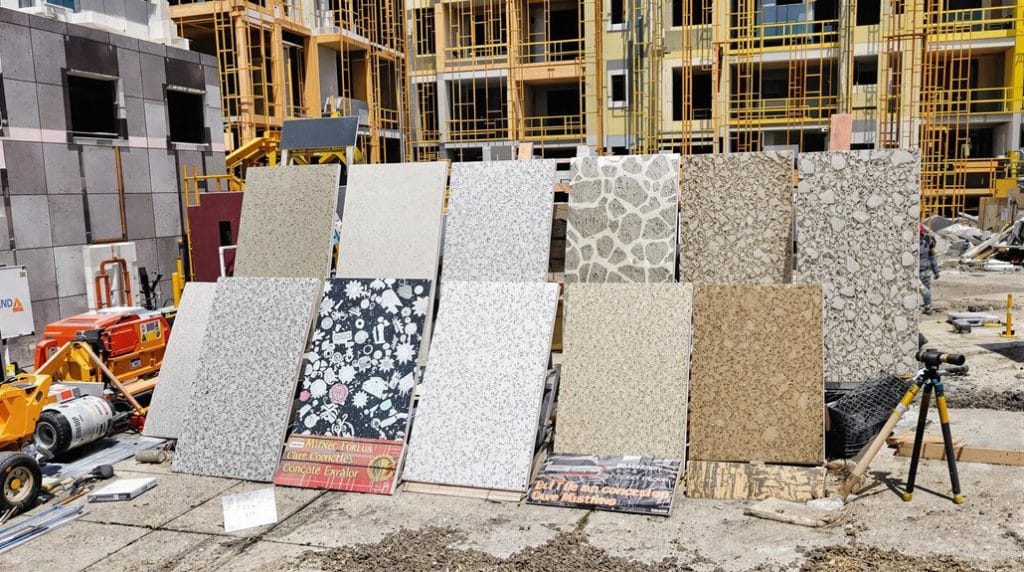
- Material Quality: Verify the type and quality of materials used, as this affects durability and longevity.
- Warranty Details: Clarify the terms of any warranties or guarantees provided on the work and materials used.
Professional contractors typically recommend resealing every 2-3 years to maintain the surface quality and extend its lifespan.
Verifying Licenses and Insurance Coverage

Beyond analyzing quotes and warranties, the selection of a concrete contractor also involves verifying their professional credentials and insurance status. This step guarantees project safety and legality, protecting against financial and legal risks. A contractor with over 10 years of professional experience demonstrates long-term industry commitment and reliability.
| Credential | Purpose | Why It Matters |
|---|---|---|
| Contractor License | Legitimizes the contractor's expertise | Guarantees compliance with local regulations and standards |
| Liability Insurance | Covers property damage or injury | Provides financial protection for the homeowner |
| Workers Compensation Insurance | Protects workers in case of injury | Guarantees responsibility for worker safety |
| Industry Certifications | Demonstrates updated industry knowledge | Assures adherence to best practices |
| Bonds | Guarantees completion of the project | Offers assurance of project fulfillment |
Expert Final Thoughts
Choosing the right concrete contractor is pivotal for ensuring a project's success. By evaluating a contractor's experience and reputation, reviewing quotes with attention to warranties, and verifying licenses along with insurance coverage, homeowners can make informed decisions. This multi-faceted approach helps mitigate risks, ensuring quality work that meets both functional and aesthetic expectations, ultimately enhancing the value and safety of the property.
Champlin MN
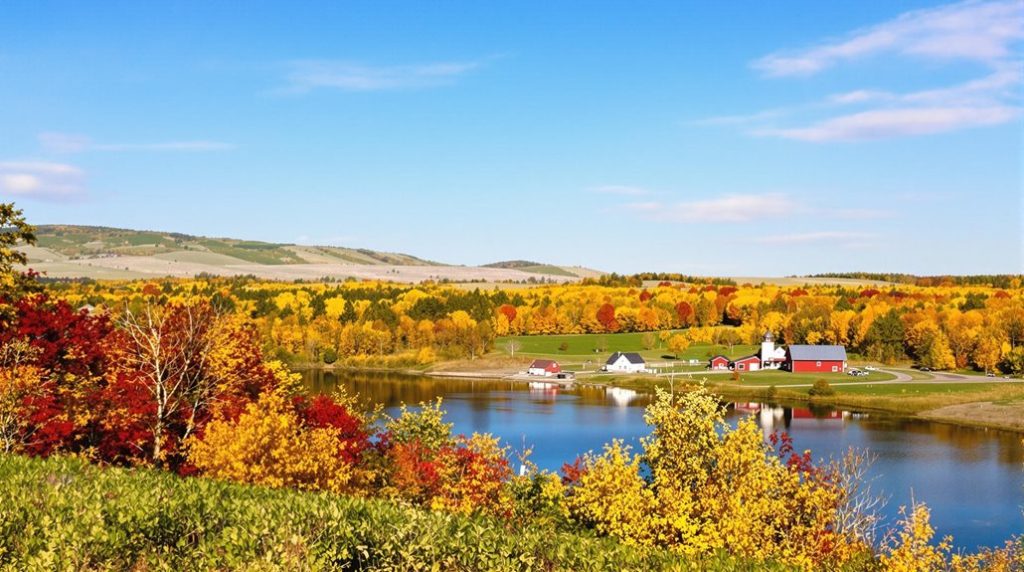
Champlin, Minnesota, offers a blend of community life, historical attractions, and outdoor activities. Residents engage through vibrant events like the Father Hennepin Festival, while the city’s history is marked by interactions with Native Americans and figures like Father Louis Hennepin. The Mississippi River and numerous parks provide scenic beauty and recreational opportunities, fostering a strong sense of community. These elements intertwine to create a rich cultural tapestry, inviting exploration of Champlin’s dynamic environment.
Expert Highlights
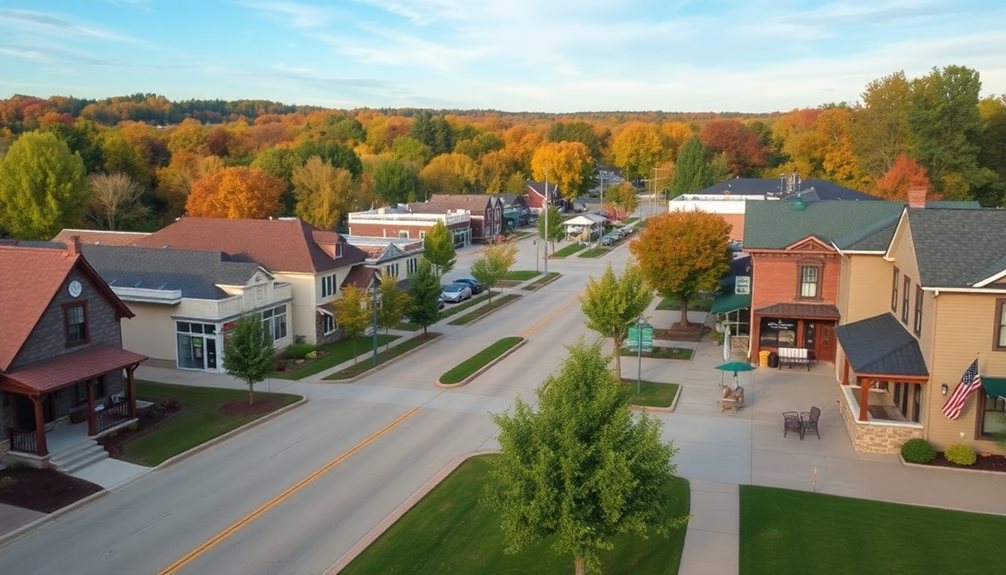
- Champlin, MN, is a suburban city with a close-knit community.
- It hosts the annual Father Hennepin Festival and many community events.
- Offers vibrant amenities, including a community center and outdoor recreation.
- Located near the Mississippi River, providing scenic views.
- Boasts convenient access to Minneapolis and local attractions.
Community Life

Champlin, MN, boasts a vibrant community life that centers around its residents’ engagement with various local amenities and services.
Residents can participate in numerous events, including the Spring Craft Market and Champlin Farmers Market, which highlight local artisans and growers.
Engage in vibrant community events like the Spring Craft Market and Champlin Farmers Market, showcasing local artisans and growers.
Additionally, Amira Choice Champlin offers extensive community programs, featuring social events, fitness classes, and educational activities tailored to residents’ interests.
Community spaces like the Champlin Community Center support gatherings and celebrations, fostering a strong sense of community bonding.
This charming Minnesota city maintains its welcoming atmosphere through local website resources that help residents stay connected.
Historical Attractions
In the heart of Minnesota, historical attractions abound that underscore the rich cultural and economic heritage of the region.
Champlin’s history is highlighted by its settlement, which dates back to early interactions with Native Americans and involves prominent figures like Father Louis Hennepin. The city’s name pays tribute to U.S. Navy Commodore Stephen Champlin, a key figure in the War of 1812.
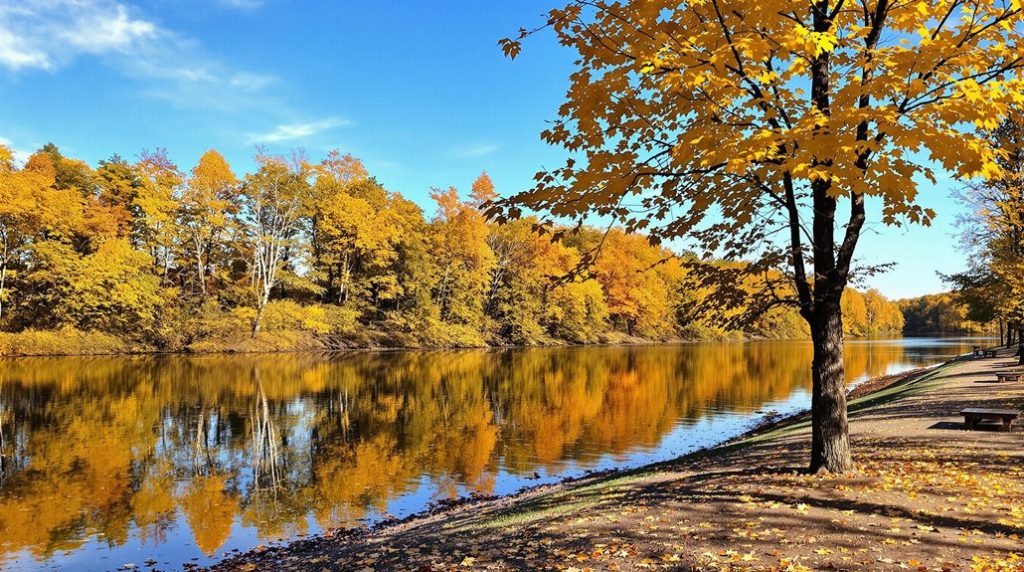
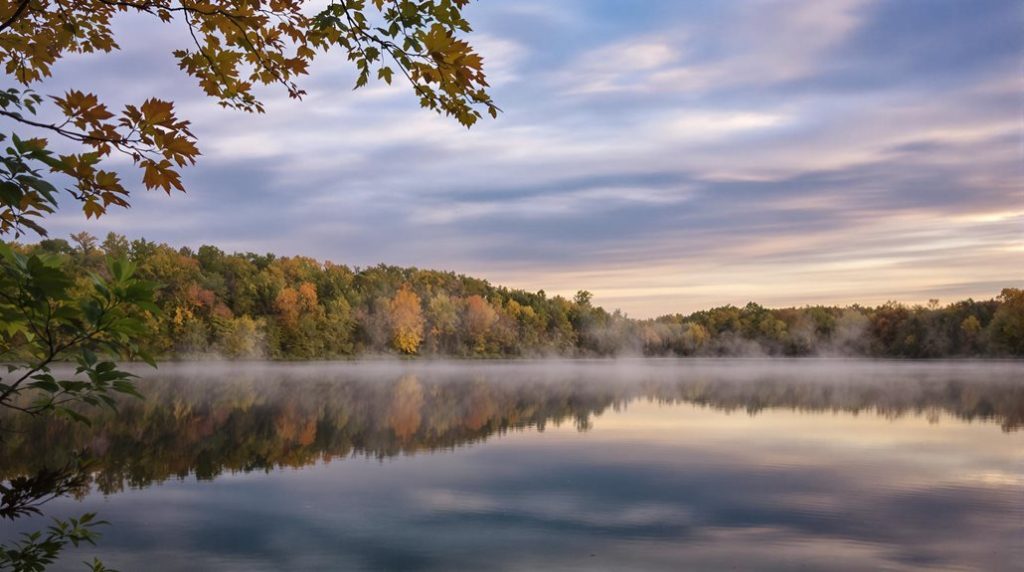
Attractions include historical parks and the annual Father Hennepin Festival, which celebrates the community’s founding. Additionally, the Mississippi River, with its historic river crossings and early transportation systems, forms a significant part of Champlin’s heritage. Many residents often take day trips to nearby Long Lake for its scenic beauty and recreational opportunities.
Outdoor Activities
Beyond the scenic beauty of Minnesota’s natural landscape, outdoor enthusiasts in the Champlin area enjoy a diverse range of activities, reflecting the region’s commitment to developing accessible and versatile outdoor spaces.
Similar to nearby St. Louis Park, the area emphasizes community-focused recreation spaces.
Parks and trails offer opportunities for multiple pursuits.
Some notable outdoor activities include:
- Hiking and Walking Trails: Available throughout various parks.
- Biking Trails: Connecting to regional trail systems.
- Cross-Country Skiing: Utilizing existing trails in winter.
- Running: Popular on both trails and sidewalks.
- Community Events: Such as outdoor recreation programs and festivals.
Cultural Events**
Cultural events in the Champlin area enrich the community’s vibrant atmosphere, complementing its outdoor activities with a diverse offering of artistic and social experiences.
The Father Hennepin Festival is a notable event, featuring music, parades, and fireworks along the Mississippi River annually in June.
Additionally, venues like Medina Entertainment Center and Crooners Lounge offer various concerts and live shows, contributing to the city’s thriving cultural scene.
These events showcase local talent and attract visitors from surrounding areas, strengthening community bonds and fostering creative expression.
Just a short drive away, Lake Minnetonka’s shores host numerous seasonal festivals and cultural gatherings throughout the year.
 Expert Final Thoughts
 Expert Final Thoughts
Champlin, Minnesota, offers a vibrant community life integrated with nature and cultural activities. Residents enjoy various local amenities, such as Mississippi Crossings and community events like the Spring Market or Summer Series. Outdoor enthusiasts benefit from proximity to parks like Elm Creek Park Preserve, providing hiking, picnicking, and scenic views. Historical significance and cultural depth further enrich the area, fostering an engaging environment for residents and visitors alike.
Brooklyn Park MN

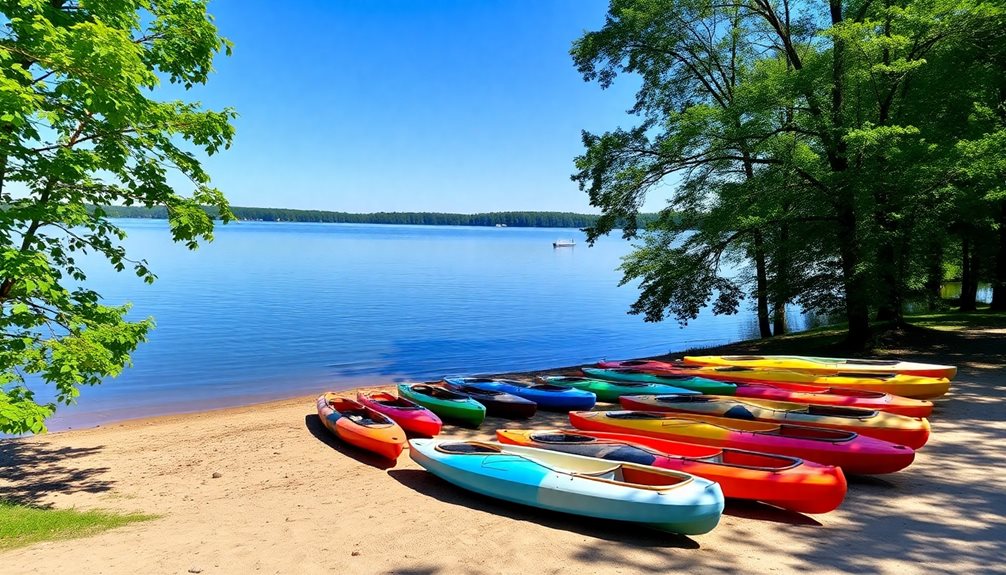
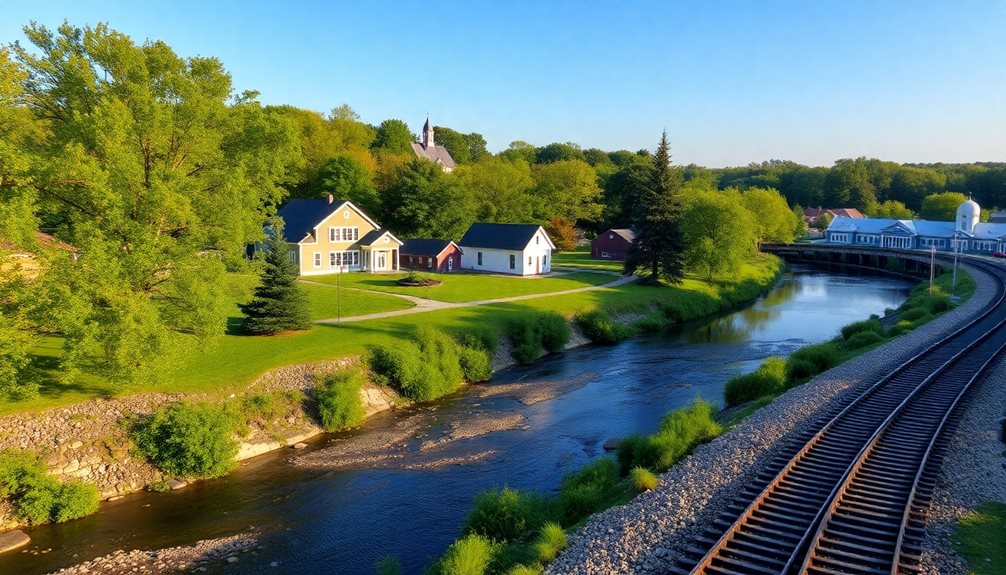
Brooklyn Park, Minnesota, offers a rich blend of natural attractions and cultural diversity. Along the Mississippi River, it boasts over 60 parks and 120 miles of trails, complemented by stunning views at Mississippi Gateway Regional Park. The community is enriched by multilingualism, international cuisines, and cultural festivals. Historic sites like Eidem Farm provide insight into rural life, while public golf courses and kayaking opportunities enhance outdoor activities. Further exploration reveals a vibrant tapestry of community and cultural experiences.
Expert Highlights
- Located along the scenic Mississippi River in Minnesota.
- Features over 60 parks and 120 miles of trails.
- Home to Mississippi Gateway Regional Park.
- Diverse community with international cuisines available.
- Rich in historic sites like the Historic Eidem Farm.
Natural Attractions

As Brooklyn Park, Minnesota, boasts an extensive park system, it offers a rich tapestry of natural attractions, complemented by its scenic position along the Mississippi River.
The city features over 60 parks, encompassing nearly 2,000 acres of parkland and 120 miles of trails, providing ample opportunities for outdoor activities. Notable attractions include Mississippi Gateway Regional Park, offering stunning river views and diverse wildlife, and the Environmental Nature Area, a newer addition with a dog park and expansive green spaces.
These natural sites enhance both local quality of life and visitor experiences. Visitors can discover hidden gems throughout Brooklyn Park’s diverse recreational spaces.
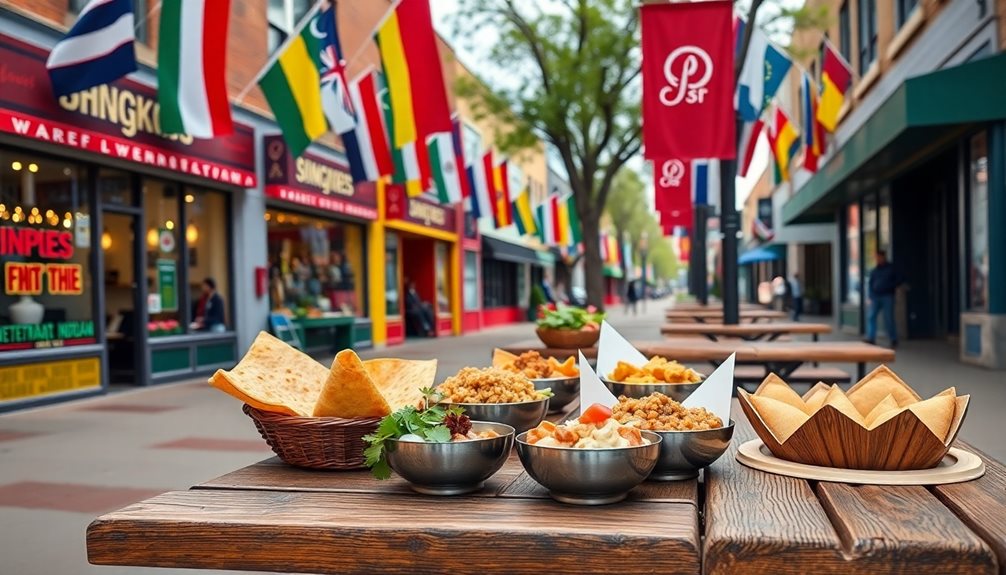
Cultural Diversity and Cuisine
Brooklyn Park, Minnesota, exhibits a vibrant cultural diversity, with over half of its population comprising people of color, making it a dynamic and inclusive community.
Brooklyn Park, Minnesota, shines with its vibrant cultural diversity, fostering a dynamic and inclusive community.
This diversity enriches the local cuisine with influences from various global traditions. Key aspects of Brooklyn Park’s cultural richness include:
- Multilingualism: Over 26% of residents speak a language other than English at home.
- International Cuisine: Local eateries offer African, Asian, and Latin American flavors.
- Cultural Festivals: Community events like the Asian New Year Celebration enhance cultural exchange.
Just a short drive from St. Louis Park, residents can explore additional ethnic restaurants and cultural attractions in the neighboring community.
Historic Sites
Historic sites in Brooklyn Park, Minnesota, offer a glimpse into the region’s rich past, where the footsteps of early Native American inhabitants gave way to pioneering settlers and eventual development.
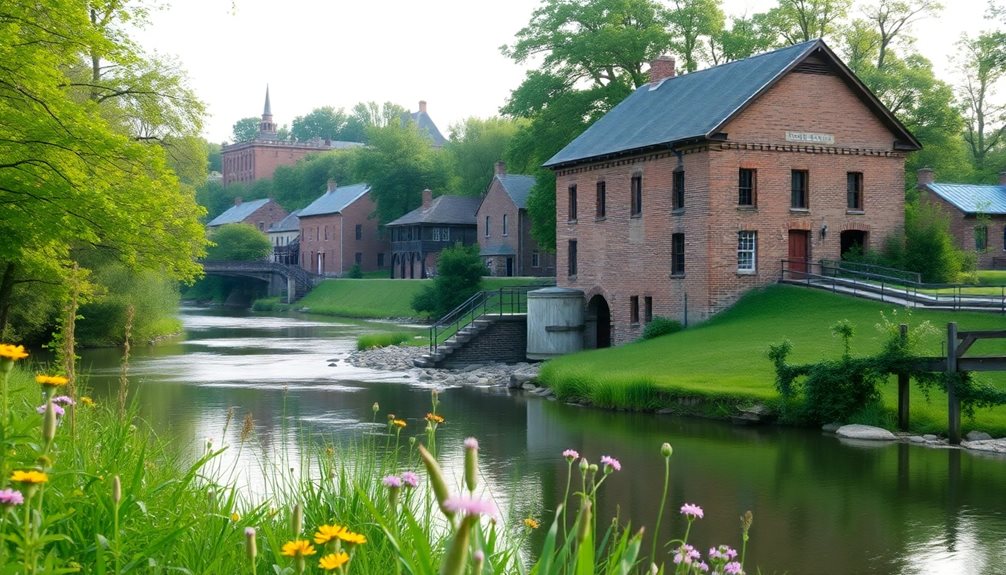
A notable historical landmark is the Historic Eidem Farm, formerly known as the Eidem Homestead, which provides insight into rural Minnesota life at the turn of the century through guided tours and living history events.
Visitors can explore restored farm buildings, including a late 19th-century barn, and engage in hands-on activities that highlight traditional practices.
Like the nearby town of Independence, Minnesota, the area showcases the enduring spirit of early Midwestern settlers who shaped these communities.
Community and Outdoor Activities**
Community and outdoor activities in Brooklyn Park, MN, flourish with a wide array of options that cater to diverse interests and age groups, reflecting the city’s vibrant and inclusive culture.
The city boasts over 60 parks, numerous trails, and exciting recreational programs. Hidden gem destinations like Rogers offer nearby alternatives for outdoor enthusiasts seeking additional recreation options.
Notable activities include:
- Parks and Trails: Over 2,000 acres of parkland and 120 miles of trails.
- Kayaking: Exploring the Mississippi River through the Paddle Share program.
- Golf Courses: Two public courses, including Brookland Golf Park and Edinburgh USA.
 Expert Final Thoughts
 Expert Final Thoughts
Brooklyn Park, Minnesota, is distinguished by its rich natural attractions, including over 60 parks and 120 miles of trails. The city boasts cultural diversity, hosting numerous international restaurants, and historic sites like the Eidem Farm. Community and outdoor activities, such as golfing and kayaking, are aplenty. With its unique blend of nature, history, and cultural experiences, Brooklyn Park offers a vibrant setting for residents and visitors alike, contributing to its status as a thriving community.
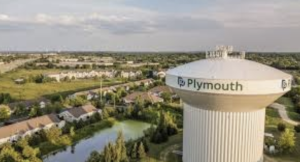
Plymouth, MN
Plymouth, Minnesota, is a thriving suburb with a rich history dating back to the 1850s, when pioneers settled the area. Officially incorporated in 1858, it merged with Medicine Lake Village in 1955. The city boasts a strong economic foundation, diverse cultural venues, and natural attractions like French Regional Park. Its robust educational system and strategic urban planning contribute to its appeal, positioning it as a desirable community with a promising future, offering more insight into its development and growth.
Expert Highlights
- Plymouth, MN, was settled in the 1850s by farmers and fur traders.
- It was officially incorporated in 1858 and merged with Medicine Lake in 1955.
- The city hosts cultural events and showcases local art.
- French Regional Park and lakes offer outdoor activities.
- Major industries include healthcare and technology.
History and Development
The history and development of Plymouth, Minnesota, unfold over several decades, beginning with its early settlement by pioneering farmers and fur traders in the 1850s.
The area’s fertile lands and strategic location attracted settlers, who cultivated the land and established a thriving agricultural community. Plymouth officially incorporated in 1858, later merging with Medicine Lake Village in 1955, marking significant growth and change into a modern suburban hub.
The city’s strategic urban planning guaranteed balanced development, contributing to its status as a vibrant and thriving community today. As the city grew, it attracted experienced contractors like Legacy General Services to support its expanding residential and commercial construction needs.
Community and Cultural Scene
Plymouth, Minnesota, is renowned not only for its historical development but also for its vibrant community and cultural scene, which have evolved markedly over the years.
The city hosts various cultural events and venues, including the Plymouth Playhouse, known for showcasing local theater talents, and the Hilde Performance Center, which features outdoor performances by local musicians.
Additionally, the Plymouth Arts Council promotes visual arts through exhibitions and art fairs, fostering a diverse and inclusive artistic community that engages residents and visitors alike.
Professional contractors provide essential services that enhance both residential and commercial spaces throughout Plymouth’s growing cultural district.
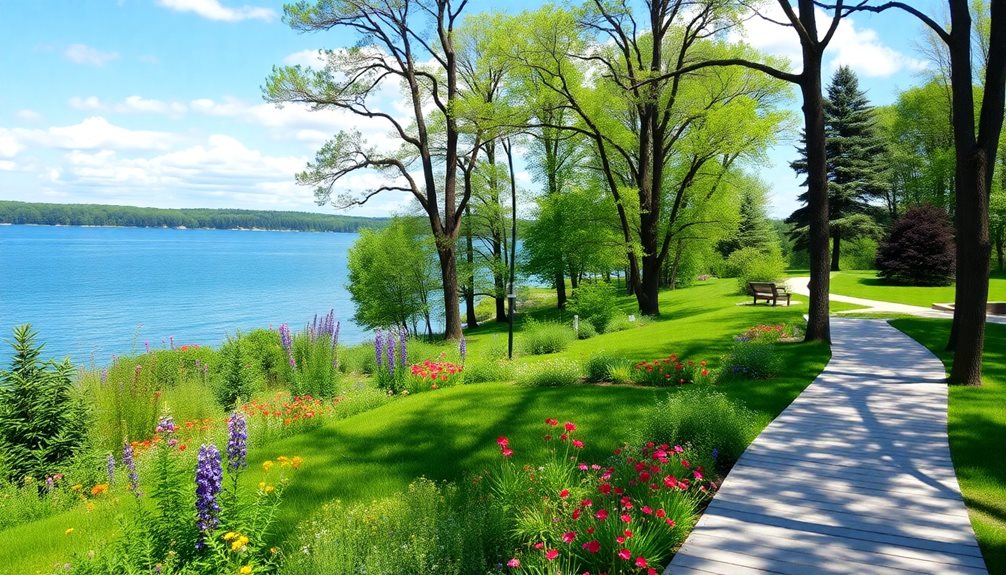
Natural Attractions and Outdoor Activities

A diverse array of natural attractions and outdoor activities enriches the lives of residents and visitors in Plymouth, MN.
French Regional Park offers extensive trails ideal for hiking and biking, alongside well-maintained picnic areas and playgrounds for family outings.
Medicine Lake and Parker’s Lake Park provide serene lakeside views, fishing piers, and boat launches, catering to both casual and serious anglers.
The Luce Line Trail offers scenic biking routes, while Medicine Lake Regional Trail is perfect for bird watching and nature walks.
Local contractors ensure these outdoor spaces remain accessible year-round with concrete apron installation that prevents water pooling and maintains safe pathways.
Economic Landscape and Education**
In addition to its wealth of natural attractions, Plymouth, Minnesota, is distinguished by a strong economic foundation and a robust educational system.
The city’s economy is bolstered by major industries such as healthcare, technology, and insurance, with key employers like Medtronic and TCF Bank contributing to its vibrancy. Recent shifts in the job market highlight the growth of healthcare and tech sectors, offering residents diverse employment opportunities.
Educationally, Plymouth boasts high academic standards, with several schools recognized for excellence, creating a desirable environment for families. The area’s development continues to thrive with concrete solutions experts providing essential infrastructure support for both residential and commercial projects.
Expert Final Thoughts
Plymouth, Minnesota, offers a blend of rich history, vibrant culture, and modern economic development. Its transformation from a small agricultural settlement to a thriving suburban city highlights resilience and strategic planning. Cultural attractions, natural beauty, and a strong educational system contribute to its appeal. With ongoing infrastructure projects and a commitment to preserving heritage, Plymouth continues to evolve as a desirable place to live and visit, balancing tradition with progressive growth.
Saint Michael, MN
Saint Michael, Minnesota, has experienced significant population growth, averaging 5.40% annually since 2000, reaching approximately 21,034 residents in 2023. The community is primarily White, with a high median household income of $130,814. Attractions include Fox Hollow Golf Club and Becker Big Woods. Its economy is strong, with a low unemployment rate and projected job growth exceeding the national average. Exploring further reveals a city with economic resilience and engaging community activities.
Expert Highlights
- Located near the Twin Cities, MN.
- Notable attractions include Fox Hollow Golf Club and St. Michael Cinema.
- Racially diverse with 87.3% White residents.
- Strong economy with high median household income.
- Thriving community with various recreational activities.
Demography and Growth
What factors contribute to the demographic make-up and growth of St. Michael, MN? The population of St. Michael has experienced significant growth, with an average annual increase of 5.40% from 2000 to 2023.
As of 2023, the city's population stands at approximately 21,034. Racially, the city is mainly White at 87.3%, followed by Black and Two or More racial groups.
The median household income is high at $130,814, reflecting a prosperous economic environment. This growth prompts an examination of both demographic shifts and economic drivers. The city's development has been supported by qualified contractors who ensure professional-grade construction and long-term durability in residential and commercial projects.
Attractions and Activities

As one explores St. Michael, attractions and activities are diverse and engaging. The city offers several facilities like St. Michael Cinema, Fox Hollow Golf Club, and outdoor spaces like Becker Big Woods. For community service, St. Michael involves residents in various events throughout the year. Local residents can rely on concrete contractor services from experienced professionals in the Twin Cities metropolitan area.
| Attraction | Description | Features |
|---|---|---|
| St. Michael Cinema | Offers movies and events | Le Musique Room |
| Fox Hollow Golf Club | Golfing with scenic views | Palmgren Lane |
| Becker Big Woods | Nature walks and wildlife spotting | Hiking trails |
| Recreation Center | Ice skating and hockey during winter | Pleasure rink |
These attractions foster community interaction and recreational avenues.
Economy and Lifestyle
The economy of Saint Michael, Minnesota, is characterized by a blend of residential growth, local businesses, and strategic infrastructure developments.
Its unemployment rate, at 4.5%, is lower than the national average, though the job market has seen a slight decline recently. Benefiting from a strong median household income of approximately $130,814, the community exhibits economic resilience.
Future job growth is projected at 36.1% over the next decade, surpassing the national average. This, alongside low poverty rates, underscores Saint Michael's economically favorable environment for residents and businesses alike.
Local contractors like Legacy General Concrete Services contribute to property values through custom stamped concrete installations that enhance residential and commercial spaces.
Popular Places to Visit**
Saint Michael, Minnesota, offers visitors an array of attractive places to explore, complementing its economically vibrant environment with diverse cultural, entertainment, and outdoor activities. When exploring the area's walkways, visitors can enjoy durable concrete sidewalks that typically last up to 30 years with proper care.
Some popular places include:
- Fox Hollow Golf Club: A family-friendly area offering a round of golf.
- Fieldstone Pond Nature Reserve: Known for its scenic sunsets.
- Gutzwiller Park: Ideal for enjoying natural settings.
- Crow-Hassan Park Reserve: Features trails through prairie land, perfect for hiking and nature exploration.

Expert Final Thoughts
To sum up, St. Michael, Minnesota, exhibits robust demographics with a projected 2025 population of 23,220, showcasing a 5.2% annual growth rate. The city's economy is bolstered by a high median household income of $130,814 and a strong employment rate. With a mix of cultural and outdoor attractions, St. Michael offers a balanced lifestyle, combining education opportunities and family-friendly environments. Its diverse activities cater to a broad community base, fostering a vibrant local culture.
Rogers, MN
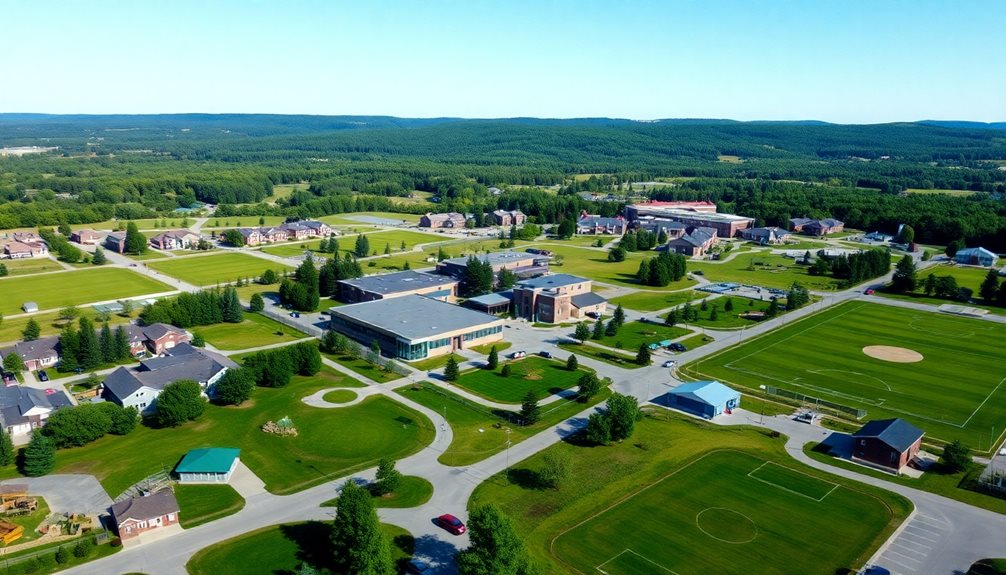
Rogers, MN is a vibrant community within the Twin Cities metropolitan area, offering a blend of urban and rural landscapes. It features family-friendly neighborhoods, engaging schools in Independent School District 728, and amenities like the Rogers Activity Center. Attractions include the Ellingson Car Museum and outdoor recreational spaces. Economic growth is driven by housing and industrial developments, enhancing the city’s appeal for both residents and businesses. For a deeper exploration of Rogers’ unique blend of lifestyle and development opportunities, further details await.
Expert Highlights
- Rogers, MN is a suburban city with a strong community focus near Minneapolis.
- Home to the Rogers Activity Center for ice skating and hockey.
- Located in ISD 728, offering quality education options.
- Attractions include the Ellingson Car Museum and outdoor recreation areas.
- Experiencing economic growth through housing and industrial developments.
Community and Lifestyle
Rogers, MN, offers a vibrant community lifestyle, underscored by its strategic location within the Twin Cities metropolitan area.
Residents benefit from access to amenities, parks, and recreational areas. The city’s schools, part of Independent School District 728, prioritize student engagement and technology.
Residents enjoy access to amenities, parks, and recreational areas, complemented by engaging schools in Independent School District 728.
Family-friendly neighborhoods are prevalent, with 65% of residents being married couples.
The lifestyle caters to various interests, including active seniors at facilities like The Wellstead of Rogers, which offers chair yoga and cultural events.
Local homeowners can enhance their properties with concrete installation services from experienced contractors serving the Twin Cities region.
Education and Amenities
Situated at the intersection of two regional roadway systems, Interstate 94 and Trunk Highway 101, the community surrounding Rogers benefits from a unique blend of urban services and rural landscapes, enhancing access to educational and recreational amenities. For construction needs, residents rely on trusted concrete solutions from local professionals serving the Twin Cities area.
| School | District | Grade Levels |
|---|---|---|
| Rogers High School | Elk River Area 728 | 9-12 |
| Rogers Elementary School | Independent District 728 | K-4 |
| Hassan Elementary School | Independent District 728 | K-4 |
| Parnassus Prep School-Grammar | Parnassus Preparatory | K-4 |
| North Woods Elementary* | Wayzata Public Schools | PK, K-5 |
Attractions and Activities
In the heart of Minnesota’s leisure and entertainment landscape, numerous attractions and activities flourishing around Rogers offer visitors a diverse range of experiences.
The Ellingson Car Museum and Gateway Antique Mall are popular spots for enthusiasts. Additionally, Rogers boasts outdoor options like Crow-Hassan Regional Park, ideal for hiking and camping, and fine dining experiences at movie theaters like Emagine Theatres, which offers luxurious movie-going experiences with gourmet food options.
Community events, such as live music and farmers’ markets, further enhance the city’s appeal. The area features extensive professional concrete services that have helped shape the city’s infrastructure and recreational spaces.
Economic Growth and Developments**
Beyond its vibrant leisure scene, the region surrounding Rogers, MN, is experiencing notable economic growth, driven by strategic developments in housing and industrial sectors.
The city has approved over 400 housing units, positioning it as a top housing development site in Minnesota. Industrial growth includes companies like Heliene, with expansive manufacturing facilities.
Rogers’ unique location at I-94 and TH 101 enhances its attractiveness to businesses, offering competitive advantages such as affordability compared to nearby suburbs. This combination fosters a thriving employment base with over 11,000 jobs. The area’s infrastructure development includes concrete driveway installations that enhance property values and complement the region’s residential expansion.

Expert Final Thoughts
Rogers, MN, is a thriving suburban community known for its family-friendly environment and strategic location near key transportation routes. Its population of 13,295 residents benefits from reputable schools, diverse housing, and an economy bolstered by industrial activities. Attractions include parks, local eateries, and access to the Twin Cities. With new developments like Laurel Creek, Rogers continues to grow, offering residents a blend of natural beauty, modern amenities, and economic opportunities.
Maple Grove, MN
Maple Grove, Minnesota, is a thriving suburban community with approximately 70,000 residents, offering a blend of natural beauty and modern amenities. It boasts over 1,000 acres of parks and trails, vibrant shopping districts, and diverse housing options. Community events like the Maple Grove Farmers Market and Summer Concert Series foster a strong sense of community. With easy access to Minneapolis, residents enjoy both suburban tranquility and metropolitan conveniences. Further exploration reveals more about its unique cultural and economic attributes.
Expert Highlights
- Location: Situated northwest of Minneapolis in Hennepin County.
- Community: Offers a suburban lifestyle with metropolitan amenities.
- Outdoor Activities: Features over 50 parks and 55 miles of trails.
- Economy: Home to over 1,600 businesses and thriving shopping districts.
- Recreation: Includes the Maple Grove Community Center for family activities.
Community and Lifestyle
Maple Grove, Minnesota, embodies a thriving community lifestyle that harmoniously balances suburban tranquility with metropolitan amenities.
The city features over 1,000 acres of parks and trails, offering extensive recreational activities. Community events like the Maple Grove Farmers Market and Summer Concert Series at Central Park foster social connections, while vibrant shopping districts provide a blend of national retailers and unique local shops.
Educational options, healthcare facilities, and diverse housing choices further enhance the quality of life, making Maple Grove a desirable place to live. Its location near Minneapolis adds to its appeal. The area’s well-maintained neighborhoods feature durable concrete driveways that withstand Minnesota’s harsh weather conditions while requiring minimal upkeep.
Historical Landmarks
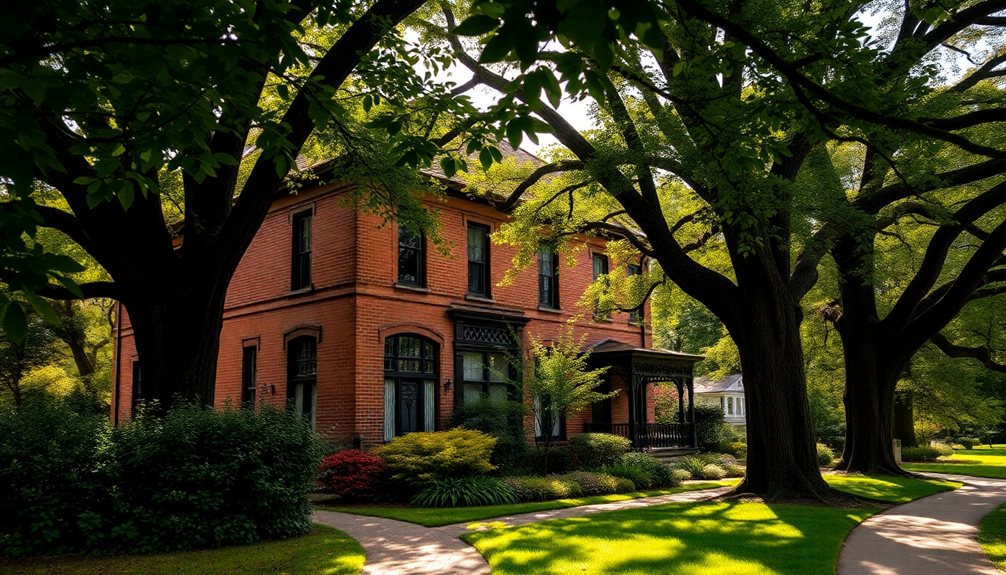
As part of its rich cultural heritage, the City of Maple Grove, Minnesota, boasts a variety of historical landmarks that not only showcase its past but also contribute to its appeal as a desirable community.
Notable sites include the Elm Creek Chalet, built in 1938, and the Pierre Bottineau House, which symbolizes early settlement.
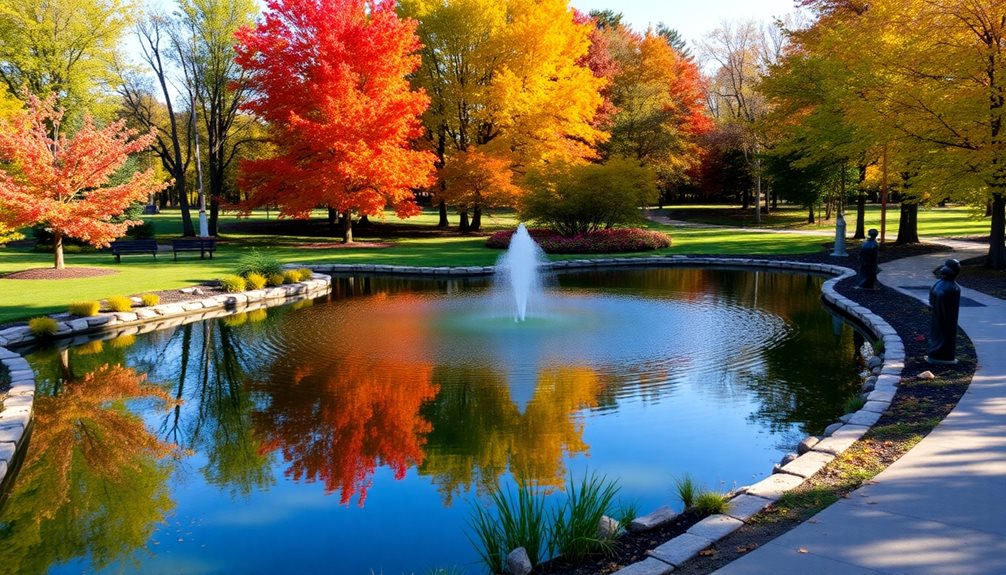
The Maple Grove History Museum provides further insight, while Elm Creek Park Reserve highlights natural history and pioneering spirit, enriching visitors’ understanding of the city’s evolution.
Many local landmarks feature concrete installations expertly maintained by Twin Cities contractors to preserve their historical integrity.
Outdoor Recreational Opportunities

Offering a diverse array of outdoor recreational opportunities, the area surrounding Maple Grove is replete with engaging activities tailored to various interests and seasons.
The city boasts over 50 parks and more than 55 miles of trails, ideal for hiking, biking, cross-country skiing, and snowshoeing. Notable destinations include Elm Creek Park Reserve, which offers extensive trails, disc golf, and a tubing hill, and Central Park, featuring an 800-foot ice-skating loop.
Additionally, water activities such as boating and kayaking are available at local lakes. The city’s well-maintained concrete sidewalks and trails provide residents with safe, durable pathways that can last up to 30 years.
Economic and Cultural Development**
Beyond its vibrant outdoor scene, the area surrounding Maple Grove is actively fostering robust economic and cultural development.
Various initiatives are underway to enhance its appeal and diversify business offerings.
Key strategies include:
- Infrastructure Improvement: Upgrading roads and utilities.
- Business Diversification: Encouraging diverse industries like medtech and retail.
- Community Engagement: Strengthening partnerships through public-private collaborations.
- Marketing Initiatives: Building a distinct brand identity for Maple Grove.
These efforts aim to create a thriving community that supports its residents and attracts new businesses and visitors.
Local contractors like Legacy General Concrete Services provide custom stamped concrete solutions that enhance both residential and commercial properties in the area.

Expert Final Thoughts
Maple Grove, Minnesota, is a thriving suburban community offering an excellent balance of urban amenities and natural environments. With over 1,600 businesses, numerous lakes, and extensive parks, it provides residents with a high standard of living and diverse recreational opportunities. The city’s strong economic and cultural development, including a significant retail presence and varied dining options, enhance its appeal as a desirable place to live and visit.
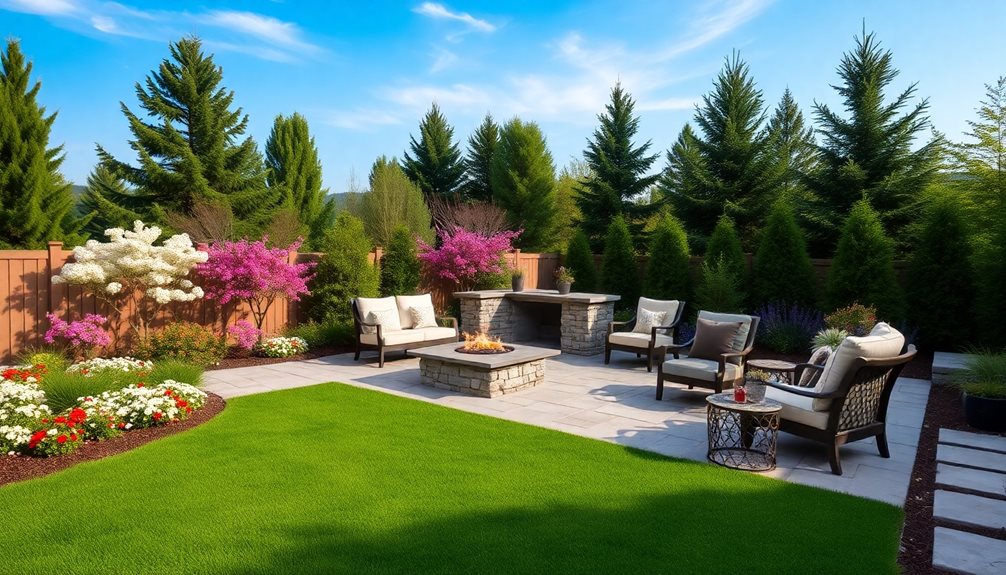
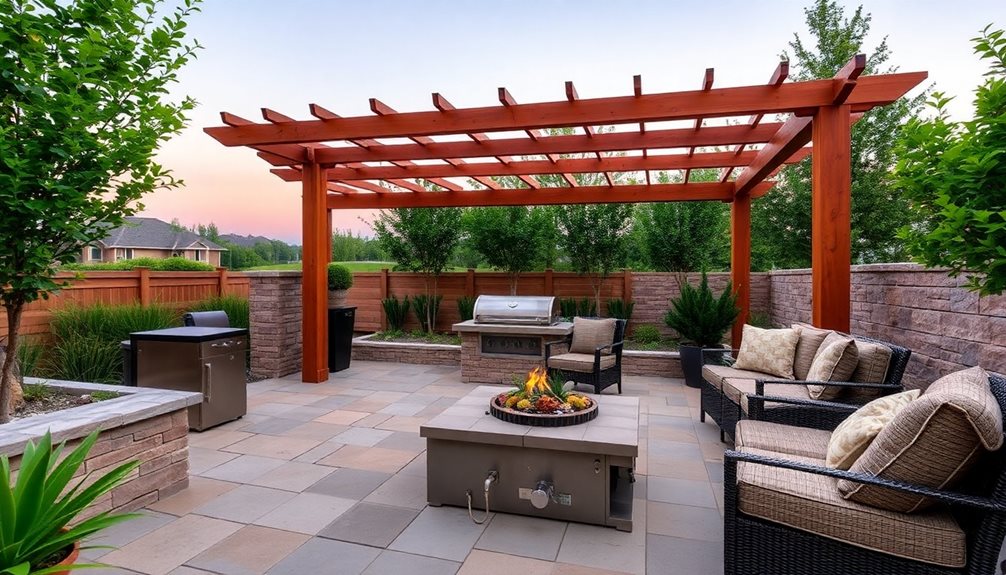
How to Build Your Dream Outdoor Living Space
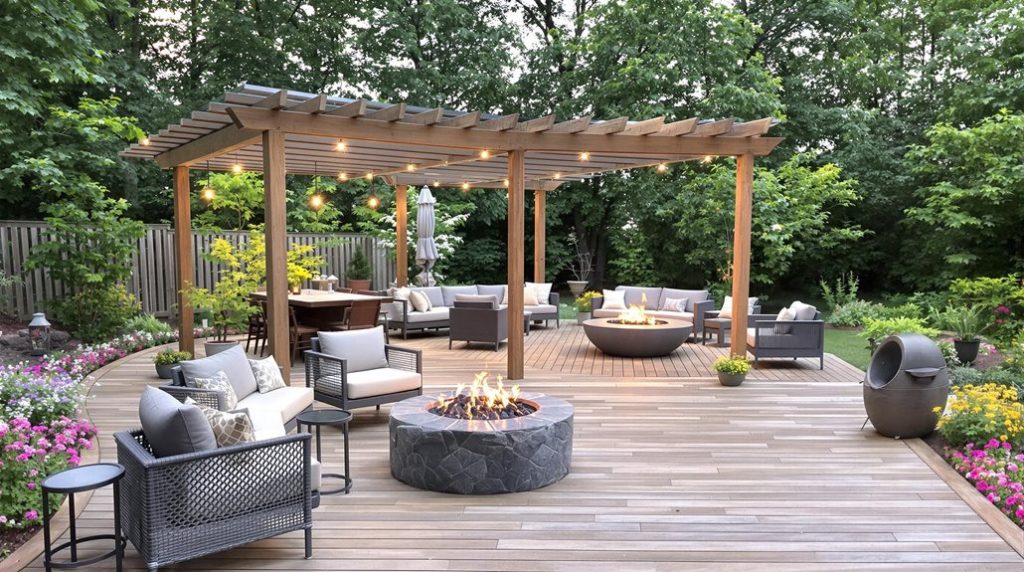
Creating a dream outdoor living space requires strategic planning across multiple dimensions, beginning with a thorough site analysis for ideal layout and traffic flow. The selection of weather-resistant materials, such as marine-grade stainless steel and solution-dyed acrylic fabrics, forms the foundation for durability. Distinct functional zones, including dining areas and conversation spaces, should be established with proper spacing and clearance. Strategic lighting, climate control features, and thoughtful plant placement enhance comfort and ambiance, while proper maintenance guarantees lasting enjoyment. Further exploration reveals specific measurements and material specifications essential for success.
Expert Highlights
- Plan your layout with careful consideration of sun exposure, traffic flow, and functional zones for dining, cooking, and relaxation areas.
- Select weather-resistant materials like marine-grade stainless steel and solution-dyed acrylic fabrics for furniture and cushions.
- Install proper lighting with LED path lights and string lights for safety and ambiance in evening hours.
- Create comfortable seating arrangements using circular or U-shaped configurations with adequate spacing between furniture pieces.
- Incorporate climate control features such as retractable awnings and outdoor heating elements for year-round enjoyment.
Planning Your Perfect Outdoor Layout
Before breaking ground on any outdoor living space, careful consideration must be given to the layout's functional requirements, spatial relationships, and environmental factors that will impact its success.
The design process begins with a thorough site analysis, documenting existing conditions such as sun exposure, prevailing winds, drainage patterns, and views. These elements inform the strategic placement of key features, including seating areas, cooking stations, and shade structures.
Traffic flow analysis guarantees seamless movement between zones while maintaining appropriate spacing for safety and comfort.
Standard measurements include 36-inch walkways, 24-inch clearance between seating, and 48-inch diameter turning spaces for accessibility compliance.
Professional installation of concrete walkways can provide durability lasting up to 30 years with proper maintenance.
Selecting Weather-Resistant Materials and Furniture

When designing an outdoor living space that will endure the elements, selecting appropriate weather-resistant materials and furnishings becomes a critical factor in ensuring long-term durability and performance.
For structural components, marine-grade stainless steel, powder-coated aluminum, and teak wood offer superior resistance to moisture, UV damage, and temperature fluctuations.
Solution-dyed acrylic fabrics, such as Sunbrella, provide fade-resistant cushions and upholstery rated for 5+ years of outdoor exposure.
High-density polyethylene (HDPE) furniture, featuring UV inhibitors and colorfast pigments, withstands extreme temperatures from -20°F to 120°F while maintaining structural integrity.
Concrete or porcelain pavers deliver slip-resistant flooring with minimal maintenance requirements.
Stamped concrete finishes offer a visually appealing and cost-effective alternative to natural stone while providing exceptional durability for outdoor spaces.
Creating Zones for Different Activities
A successful outdoor living space incorporates distinct functional zones that allow for seamless changes between different activities and social gatherings. The primary zones typically include dining areas, conversation spaces, and cooking stations, strategically separated by walkways or connecting elements.
When designing these zones, spatial relationships become critical. The cooking area should maintain proximity to indoor facilities while remaining separate from relaxation spaces.
Conversation areas benefit from circular or U-shaped seating arrangements, while dining zones require adequate clearance for chair movement and service access.
Each zone should feature appropriate lighting, shade solutions, and storage elements specific to its intended function.
Similar to concrete driveway installation, proper grading and surface preparation are essential for creating stable, long-lasting outdoor living zones.
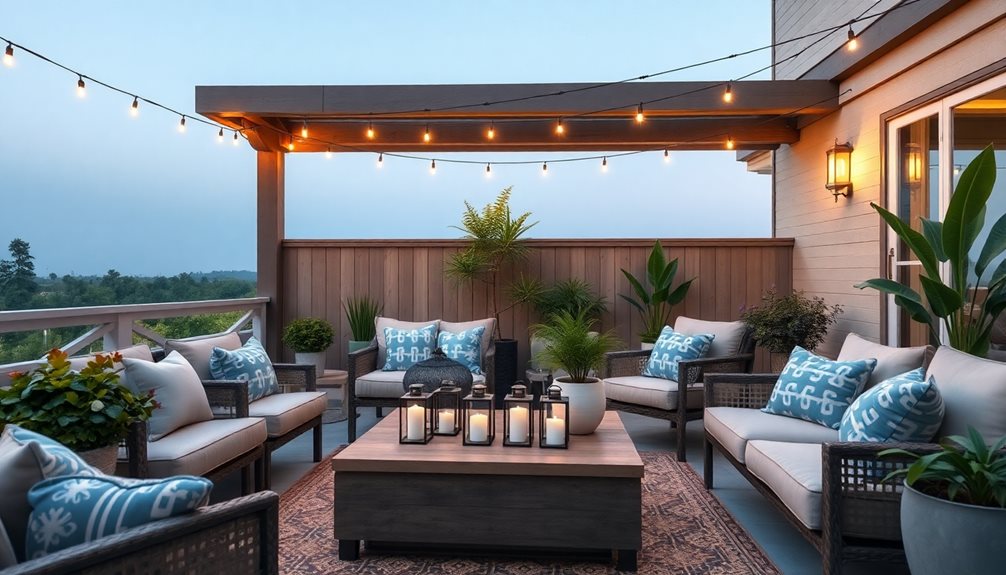
Essential Elements for Comfort and Ambiance
To create a truly inviting outdoor living space, homeowners must carefully incorporate essential comfort and ambiance elements that transform basic outdoor areas into welcoming sanctuaries.
- Strategic lighting installations, including LED path lights, adjustable overhead fixtures, and decorative string lights, establish both safety and atmosphere while extending usability into evening hours.
- Climate control features such as retractable awnings, misting systems, and outdoor heating elements guarantee year-round comfort regardless of weather conditions.
- Thoughtful acoustic elements, incorporating water features, strategic plant placement, and sound-absorbing materials, create an immersive environment while minimizing unwanted noise from surrounding areas.
A concrete patio installation provides a durable and low-maintenance foundation that requires up to 75% less upkeep than alternative outdoor flooring materials.
Expert Final Thoughts
Building an ideal outdoor living space requires careful consideration of layout, materials, zoning, and atmospheric elements. By thoughtfully selecting weather-resistant furnishings, establishing distinct functional areas, and incorporating essential comfort features like shade and lighting, homeowners can create a versatile extension of their indoor living space. With proper planning and attention to detail, an outdoor sanctuary can serve as a valuable investment in both property value and lifestyle enhancement.
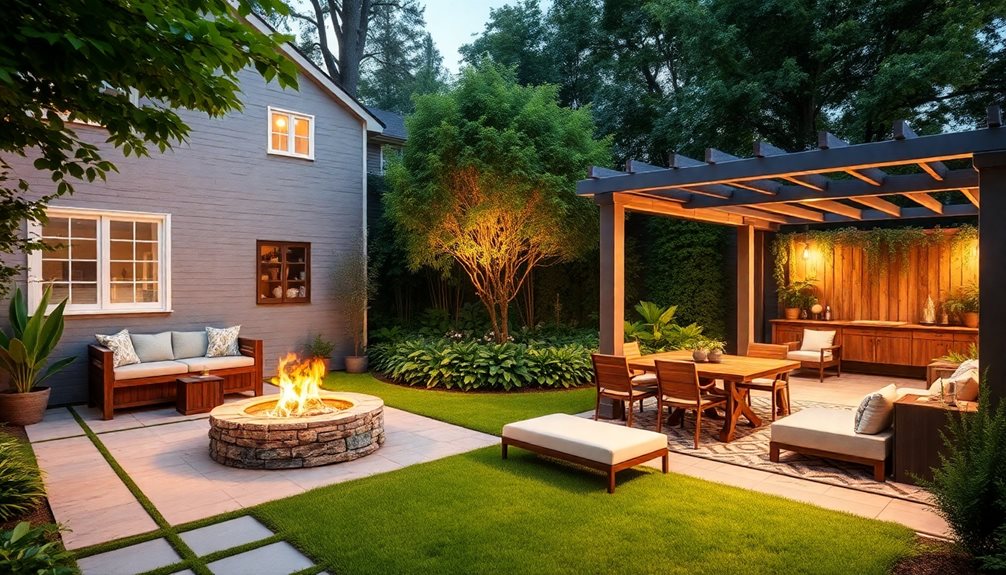
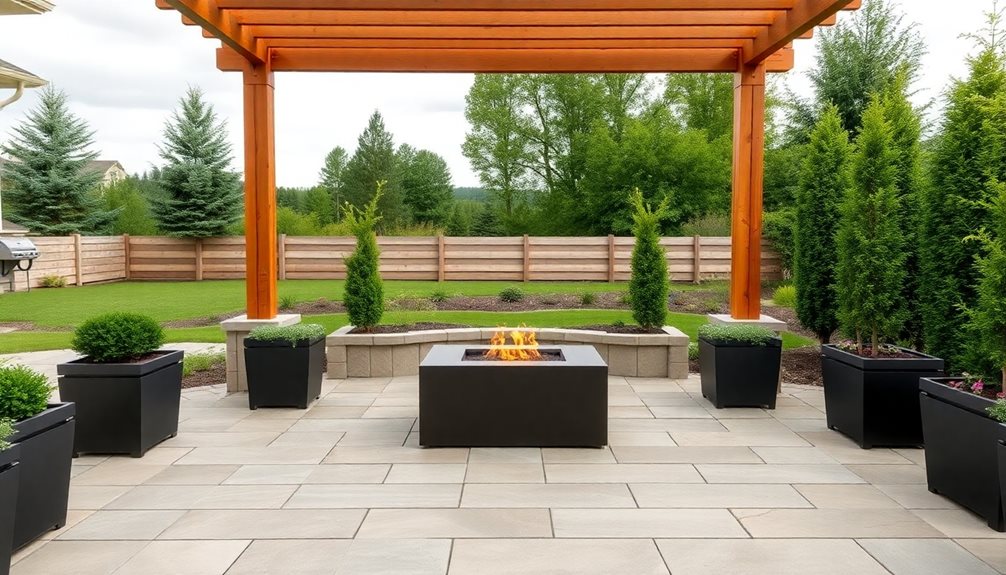
Design Your Dream Outdoor Living Space With Style
Creating a dream outdoor living space requires strategic planning across five essential elements: functional layout, comfort zones, lighting design, weather protection, and durable foundations. A well-designed space prioritizes clear traffic patterns between activity zones, incorporates weather-resistant furniture and decor, implements layered lighting for ambiance, and utilizes climate-smart features like retractable awnings and heating solutions. Professional installation of concrete surfaces and proper drainage systems guarantees lasting durability, while thoughtful design elements transform ordinary patios into sophisticated outdoor sanctuaries that invite deeper exploration.
Expert Highlights
- Create distinct zones for lounging, dining, and cooking with clear pathways to ensure smooth traffic flow between areas.
- Install layered lighting with LED path lights, pendant fixtures, and spotlights to enhance ambiance and functionality after dark.
- Choose weather-resistant furniture with deep cushions, complemented by outdoor rugs and pillows for comfort and style.
- Incorporate adjustable shade solutions like retractable awnings or pergolas to maintain comfort throughout changing weather conditions.
- Install durable concrete surfaces with decorative finishes for long-lasting foundations that blend function with aesthetic appeal.
Essential Elements for a Functional Outdoor Layout
When designing a functional outdoor living space, careful consideration must be given to several foundational elements that work in harmony to create a cohesive and purposeful environment.
The layout must prioritize traffic flow patterns, establishing clear pathways between activity zones while maintaining appropriate spacing for furniture and equipment.
Smart outdoor design puts flow first, creating intuitive paths between spaces while ensuring furniture and features have room to breathe.
Key structural components include properly scaled seating areas, designated cooking zones, and adequate shade coverage through pergolas or natural canopies.
Weather-resistant surfaces, proper drainage systems, and strategic lighting placement guarantee year-round functionality.
Storage solutions, utility access points, and temperature control features complete the essential framework, enabling seamless shifts between indoor and outdoor living spaces.
A concrete patio installation provides durability and weather resistance while requiring minimal maintenance compared to other outdoor surface materials.
Creating Comfort Zones With Furniture and Decor
To establish inviting comfort zones within an outdoor living space, careful selection and strategic placement of furniture and decorative elements serve as the foundation for creating distinct functional areas.
Weather-resistant seating arrangements, including deep-cushioned sofas and swivel chairs, should be positioned to facilitate conversation while maximizing views of the surrounding landscape.
Layered lighting elements, such as overhead pendants, landscape spotlights, and tabletop lanterns, create ambiance while extending usability into evening hours.
Decorative all-weather throw pillows, outdoor rugs, and potted plants add warmth and texture, effectively defining separate zones while maintaining visual cohesion throughout the space.
Consider installing durable concrete sidewalks to create elegant pathways between your outdoor living zones, as they can last up to 30 years with proper maintenance.
Lighting and Ambiance for Day-to-Night Entertainment
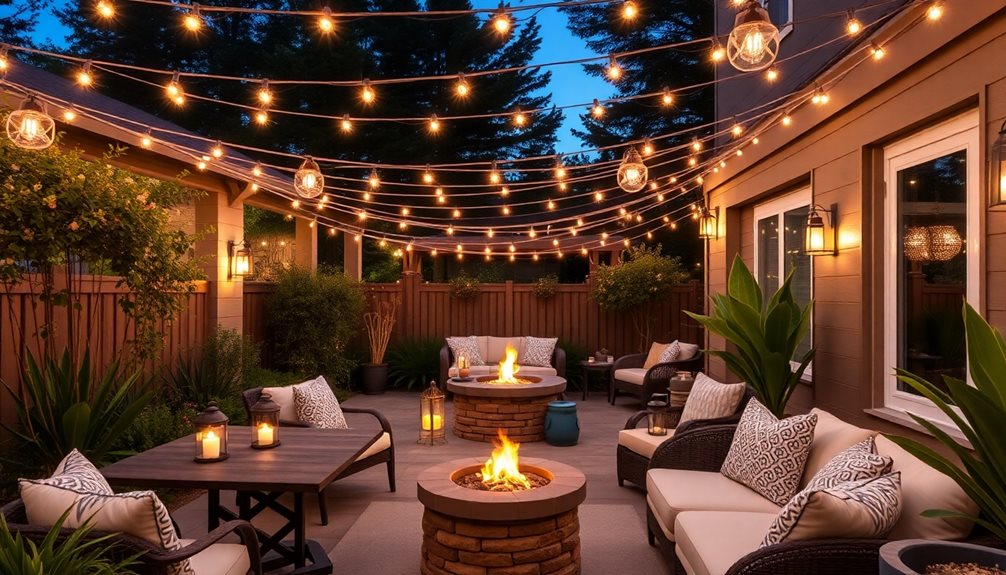
Strategic lighting design transforms outdoor living spaces from daytime retreats into enchanting nighttime entertainment venues, requiring careful consideration of both natural and artificial illumination sources.
Layered lighting techniques incorporate three essential elements: ambient lighting for overall illumination, task lighting for functional areas, and accent lighting to highlight architectural features.
Well-positioned LED path lights, mounted at 14-16 inches height, guarantee safe navigation while creating visual interest.
Professional designers recommend combining multiple lighting types: low-voltage landscape lights (4-15 watts), weather-resistant pendant fixtures (25-60 watts), and adjustable spotlights (20-50 watts).
Strategic placement of fixtures at varying heights creates depth while minimizing harsh shadows and glare.
Stamped concrete surfaces provide an elegant foundation for outdoor lighting designs while offering durability that lasts over 25 years.
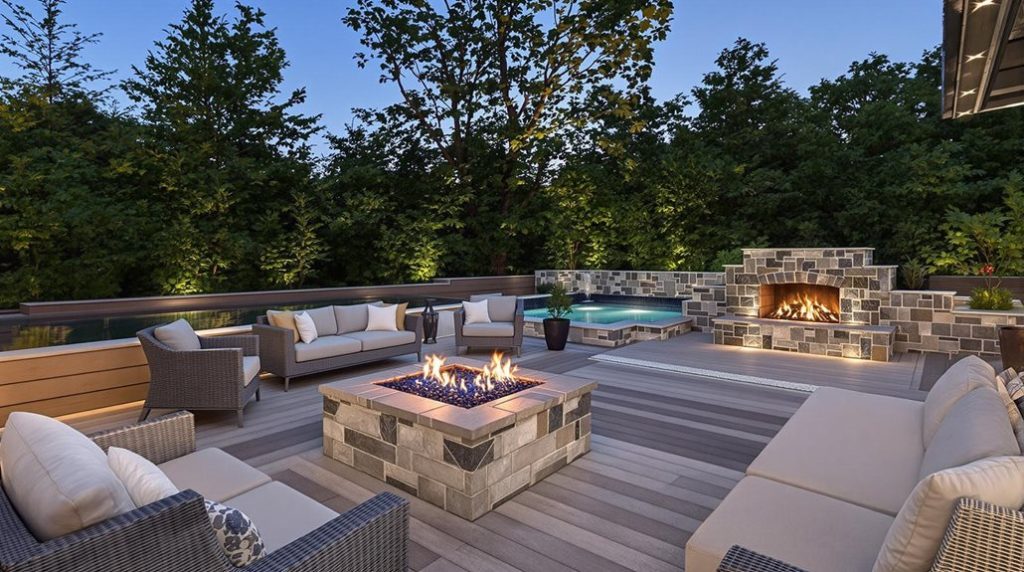
Weather-Smart Solutions for Year-Round Enjoyment
Maximizing outdoor living spaces throughout the changing seasons requires extensive weather protection solutions that address temperature extremes, precipitation patterns, and environmental challenges.
Retractable awnings and pergolas with adjustable louvers provide essential shade control while allowing ventilation. High-performance outdoor heaters, rated at 40,000 BTUs, extend evening gatherings into cooler months.
Flexible shade structures paired with powerful heating solutions create comfortable outdoor spaces that can be enjoyed regardless of weather conditions.
For moisture management, integrated drainage systems and permeable surfaces prevent water accumulation. Wind barriers, including tempered glass panels and strategic landscaping, create protective microclimates.
Durable materials like powder-coated aluminum and marine-grade fabric withstand UV exposure, salt air, and temperature fluctuations while maintaining aesthetic appeal. Professional installation of concrete driveways provides a lasting foundation that can endure up to 30 years of heavy use while complementing your outdoor design.
Expert Final Thoughts
A thoughtfully designed outdoor living space transforms an ordinary backyard into a sophisticated extension of the home, seamlessly blending functionality with style. Through careful consideration of layout, comfort features, lighting design, and weather-resistant elements, homeowners can create an inviting retreat that serves their needs year-round. By implementing these essential design principles and practical solutions, any outdoor area can become a versatile environment for relaxation, entertainment, and everyday living.
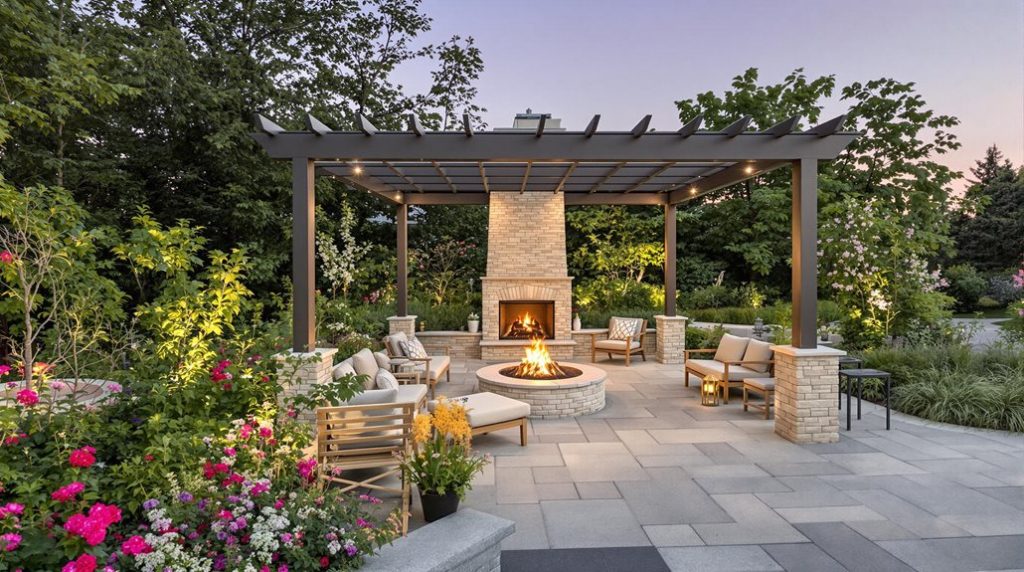
Expert Outdoor Patio Design & Installation Services
Expert patio design and installation services combine detailed planning, premium materials, and professional craftsmanship to create lasting outdoor spaces. The process begins with thorough site evaluation, addressing factors like drainage and slope requirements, followed by selecting durable materials such as natural stone or high-grade composites. Professional installation adheres to industry standards, incorporating custom features like built-in seating and lighting systems. Understanding the complete transformation process reveals how these spaces enhance property value while providing decades of enjoyment.
Expert Highlights
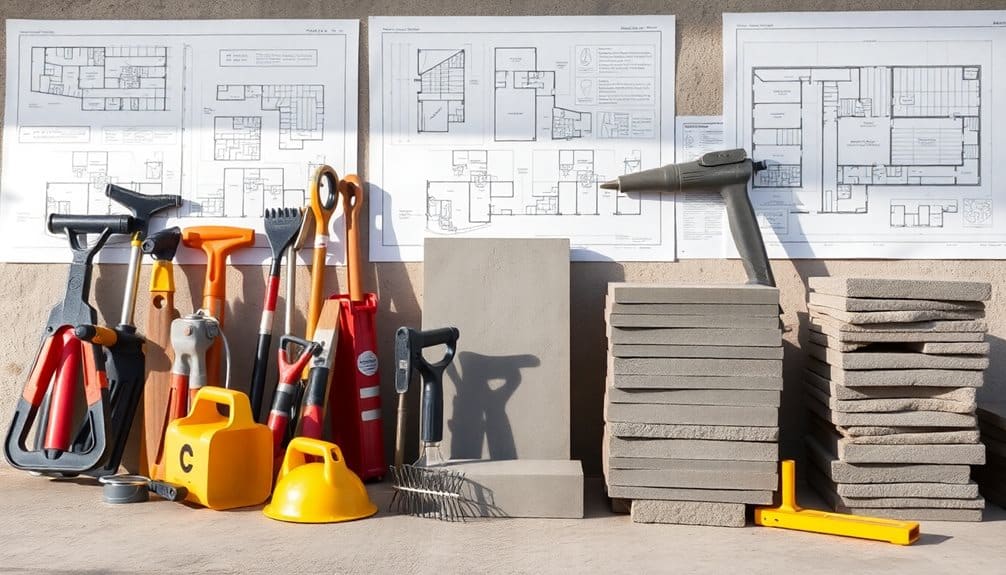
- Professional patio designers create scaled drawings and detailed plans to ensure precise execution and accurate cost estimation.
- Expert installers use premium materials like natural stone pavers and marine-grade fasteners for maximum durability and longevity.
- Installation follows strict industry standards, including proper site preparation, excavation depth, and drainage slope requirements.
- Custom features such as built-in seating, pergolas, and lighting systems enhance functionality and aesthetic appeal.
- Quality workmanship and materials combined with regular maintenance can provide up to 30 years of outdoor enjoyment.
Planning Your Perfect Patio Design: From Vision to Blueprint
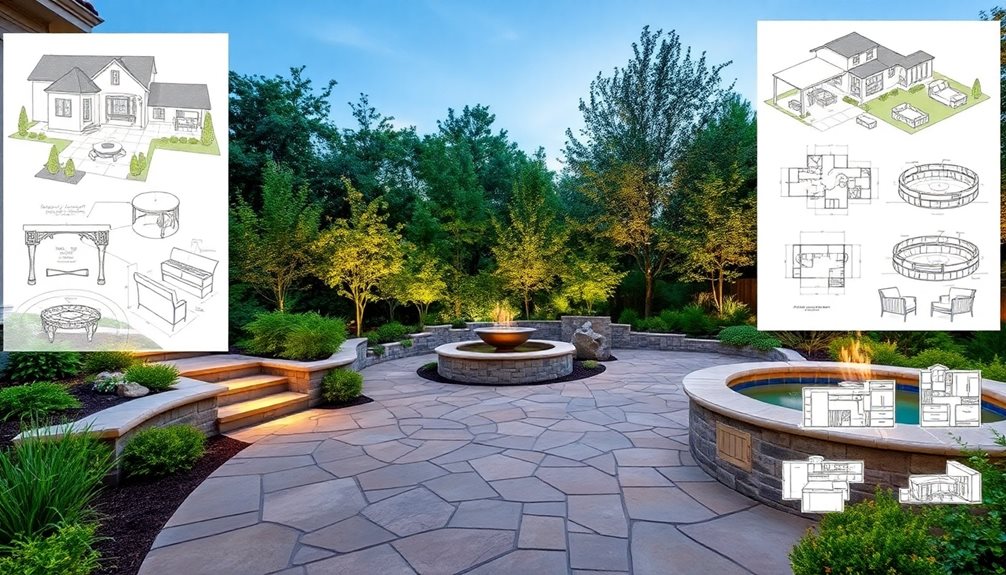
A well-designed patio begins with meticulous planning, careful consideration of spatial constraints, and a thorough understanding of the property's unique characteristics.
Professional designers evaluate key factors including ground slope, drainage patterns, and existing landscape features to develop optimal layout solutions.
The planning phase incorporates detailed measurements, material specifications, and structural requirements while accounting for local building codes and zoning regulations.
Designers create scaled drawings that precisely map the patio's dimensions, elevations, and integrated elements such as built-in seating, fire features, or outdoor kitchens.
This extensive blueprint serves as the foundation for accurate cost estimation, material procurement, and efficient construction execution.
Our experienced team creates designs that maximize the concrete patio benefits including reduced maintenance needs, weather resistance, and long-lasting durability.
Selecting Premium Materials for Long-lasting Results
Premium material selection stands as the cornerstone of creating an enduring, aesthetically pleasing outdoor living space that withstands the elements while maintaining its beauty.
Natural stone pavers, including travertine and granite, offer superior durability with compression strengths exceeding 12,000 PSI.
High-grade composite decking materials, engineered with UV-resistant polymers and wood fibers, provide exceptional longevity while requiring minimal maintenance.
These materials resist fading, scratching, and mold growth through advanced manufacturing processes.
For structural elements, marine-grade stainless steel fasteners and pressure-treated lumber rated for ground contact guarantee maximum stability and corrosion resistance in outdoor environments.
Stamped concrete surfaces offer a cost-effective alternative to natural stone while providing durability that can exceed 25 years with proper maintenance.
Professional Installation Process and Construction Standards
Executing professional patio installation demands rigorous adherence to industry standards and precise construction methodologies throughout every phase of the project. Each step requires careful attention to specifications, from initial site preparation to final finishing touches. Legacy General Services delivers exceptional concrete craftsmanship with over 10 years of industry expertise in the Twin Cities area.
| Phase | Key Requirements | Quality Standards |
|---|---|---|
| Planning | Site Survey, Permits | Local Code Compliance |
| Excavation | 4-6" Depth, Grading | 1% Slope for Drainage |
| Base Prep | Compacted Gravel | 95% Compression Rate |
| Installation | Material Placement | Level Within 1/8" |
| Finishing | Joint Filling, Sealing | Manufacturer Specs |
Professional installers utilize laser-level technology, engineered drainage solutions, and precise measuring tools to guarantee lasting structural integrity. This systematic approach assures that each patio meets strict construction standards while providing ideal functionality and durability.
Enhancing Your Outdoor Space With Custom Features
Transform ordinary patios into enchanting outdoor sanctuaries through the strategic integration of custom design features, which elevate both aesthetic appeal and functional versatility.
Elements such as built-in seating, pergolas, and customized lighting systems create distinct zones while maximizing available space.
Strategic design choices like integrated seating and overhead structures transform ordinary patios into defined living spaces that optimize every square foot.
Water features, including tiered fountains or cascading wall installations, introduce soothing ambient sounds while serving as dramatic focal points.
Climate-controlled elements, such as integrated misting systems and infrared heating units, extend seasonal usage capabilities.
Premium materials like hand-carved stone, architectural concrete, and marine-grade stainless steel guarantee longevity while delivering sophisticated design elements that complement existing architecture and landscaping features.
Professional installation ensures your outdoor space will provide up to 30 years of enjoyment with proper maintenance and care.
Expert Final Thoughts
A professionally designed and installed patio transforms any outdoor space into a functional extension of the home, providing years of enjoyment when executed with careful planning, premium materials, and expert craftsmanship. Through methodical design processes, material selection aligned with local climate conditions, and adherence to construction best practices, homeowners can achieve an outdoor living space that balances aesthetic appeal with long-term durability and practical functionality.